Uploads from Me

Friday, October 21, 2011

10/21 Digital Photography School

     
    Digital Photography School    
   
Want to Get Published? Avoid These 6 Mistakes to Create Magazine-Worthy Images
October 21, 2011 at 6:31 PM
 

A Guest Post by Lara White from PhotoMint.

If you are trying to break into the glamorous world of wedding magazines and blogs, stay away from these six mistakes listed below. These tips will show you what to avoid when it comes to wedding photography, and what to do instead.

6BBS0284-Remastered.jpg

Using Flash

Look through wedding magazines and one thing you will notice missing from most images is flash. Of course, there are times when it can't be avoided, and in these cases using bounced flash is the way to go. Unlike direct flash, a bounced flash creates directional light which will highlight contours.

0071a_Remastered.jpg

Using a High F stop

Another thing missing from most wedding images featured in magazines is a high f stop. Details just look better with a soft background. Isolate your details from visual clutter surrounding it to allow that detail to shine through in your image. We typically capture details at f2.8 or lower. By using as low an f stop as possible, you also eliminate the need for flash in most cases.

20071201_TE_0353a_RM.jpg

Not Removing Visual Clutter

Sometimes the only thing standing between a great image and a throw away is a half-empty soft drink. Or a plastic bag. When capturing key moments and details, scan the frame for visual clutter. Things that will ruin an otherwise great image, like a half-eaten plate of food, the plastic bag the wedding dress came in, salt shakers, purses and coats at the table, or a wet stain on the linen are all items that can distract and ruin an otherwise gorgeous moment.

20071201_TE_0625a_RM.jpg

Missing Key Details & Moments

Doesn't it just kill you to walk into the cocktail hour and see an escort card table in a complete ramshackle? You can tell from looking at it that 10 minutes ago it was a complete work of art. All you're left with is a few scattered cards and some empty appetizer plates. This can be avoided with some simple planning. Talk to the bride, the planner and or the floral designer to get a sense for the various details and where and when they will be set up. This way you can plan to capture those gorgeous details in their pristine state, which is usually 1-5 minutes after setup is complete. You've got to be quick on those details!

20081025_JR_0111a_RM.jpg

Not Having Enough Time

If your goal is to get published, one of the worst things you can do is gloss over the details of the wedding design and décor. As far as magazines and wedding blogs are concerned, details are where it's at. If you do not allow yourself enough time in the photography plan, you are likely to miss key details. It is also likely you won't have enough time to capture them properly. Details tell the story of the day.

Geoff_White_Photography_Spain2.jpg

Random Photoshop Actions Applied to Images

When putting together your submission, avoid applying random Photoshop actions to a handful of images from the same wedding. Images with a "vintage" look don't work next to a "gritty" look in a layout. If you are going to apply a vintage look to a wedding, go ahead and apply that look to the entire submission in order to keep a consistent look and feel to it. Otherwise, it looks out of place. Staying consistent in your style helps define you and your work.

0153a_Remastered.jpg

There you have it. This is just a smattering of advice related to getting your wedding images published.

If you are interested in getting more advice and tips on the subject, you can download my FREE ebook: Get Published: A Guide for Wedding Photographers. It's loaded with advice, tips and tricks that our studio has used to get published over 70 times in the last four years alone.

Good luck with your submissions process. Let me know how it goes. I would love to hear your thoughts in the comments below.

Lara White is a photographer and author from San Francisco, CA. Check out her free guide to getting published: Get Published: A Guide for Wedding Photographers or visit PhotoMint, a blog filled with photography business tips and marketing advice.

Post originally from: Digital Photography Tips.

Check out our more Photography Tips at Photography Tips for Beginners, Portrait Photography Tips and Wedding Photography Tips.

Want to Get Published? Avoid These 6 Mistakes to Create Magazine-Worthy Images


Switch to Manual Mode
October 20, 2011 at 11:55 PM
 

A Guest Post by Sam Levy from citifar.

In the past couple of years, the price for DSLRs and other fancy cameras has decreased dramatically and these cameras have become affordable to many more photo-enthusiasts. I often stroll Fifth Avenue in New York City and observe so many tourists using their DSLR to ‘snap’ rather than photograph. There is nothing wrong with snapping but I can’t help feeling puzzled by the reasons beyond their purchase of an expensive and heavy camera instead of a good and cheaper point and shoot.

citifari_tour_photo_action.jpg

Since I started citifari to run photo tours for photo-enthusiasts of all levels, I have listened to some of the reasons for not using the manual mode. It is usually one of these:

  • I never took a photography class
  • I don’t have time to think about these settings when I take a picture
  • I am afraid of my camera’s settings, or
  • It would take bad pictures

Essentially: fear and/or effort. Let’s think about it for a second and let’s tackle them one by one.

20110619-IMG_7846.jpg

Taking bad pictures

What makes a bad picture? Is it only a picture that is not in focus and/or poorly exposed? No, there are plenty of ways to take bad pictures. Rather, then, what makes a good picture? Is it only a picture in focus and properly exposed? Not either! Chances are that you are already taking bad pictures (I did not say only)! So where is the fear? That you will take more bad pictures? Are you afraid at the possibility of maybe taking one good picture by chance? If it is only fear, you are in the digital world: take one picture in manual mode and then switch to automatic to capture that shot you were afraid to miss, it won’t cost you anything additional and with practice you will realize that you don’t need the additional security shot.

_PJH4757.jpg

Your camera’s settings

If the reason for the purchase of your fancy camera wasn’t a fashion statement or to get some exercise by carrying a heavy camera bag, it was probably in order to be able to play with the settings in order to get control over the camera and get those nice shots.  What has changed since? You became intimidated by the possibilities of your camera? You don’t know where to start? You need only to consider three variables to take a picture: the aperture, the ISO and the shutter speed. Forget for now all the fancy options hidden in the menus of your camera. Just these three will get you a long way. Play with them, mess with them, read more, take a class. But again: if you are afraid to miss a shot, take your picture in manual and turn to automatic as a safety.

20110210-IMG_2205-Edit.jpg

I never took a photography class

The easy answer to this is: take one. But I would like to augment that by: if you don’t have the time or the means to, you don’t need to take a class. There are a ton of resources online to teach you about the basics of photography, including DPS which I keep reading for tips, tutorials and lessons from professionals. The best class is probably to take your camera out, take more pictures and experiment. With digital, you can take as many pictures as you wish without incremental cost, with software at home you look at the effect of the changes in one parameter by comparing two pictures otherwise similar.

20110410-IMG_5818.jpg

I don’t have time to think settings when taking a picture

True, this one will be the hardest to overcome. It requires practice in order to build the automatisms you need so that you can set your capture the way you want in manual mode. But once again, you can start gradually. When you have time, force yourself take your picture in manual mode and when you don’t have time, turn on the automatic mode. You will gain with practice and will never want to go back to automatic mode after a while. Ultimately, the manual mode will add fractions of seconds to your setup but your end result will improve much more than the extra effort. Also, as a by-product, you will think more about your picture before the shot and the message will pass better.

I would like to add one more reason why you might not be using the manual mode.

20110430-IMG_6158-Edit.jpg

I don’t know what the automatic mode does

If you knew you probably would not use it. You purchased your camera in order to control your pictures and instead, the automatic mode selects everything for you:

  • the focus point: your picture will be focused somewhere but not always on the subject you picked as a point of interest
  • the exposure: your picture will be exposed so that it matches an ‘average grey’. This will probably not help seeing what you wanted to show in your highlights or in the shadows.
  • all other settings: the processor inside the camera did not know whether you wanted to freeze the movement or on the contrary, to have a slow shutter speed, it does not know either whether you wanted to throw everything out of focus behind your subject or to have an ‘all in focus’ landscape

20110619-IMG_7831.jpg

You invested and are now carrying your camera because you decided to tell the camera what to capture: you want to be in control and you don’t want now to let the camera decide for you instead. Forget the automatic mode and switch progressively to manual… (you might want to explore the semi-automatic modes aperture and shutter speed priorities too).

Sam Levy is the founder of citifari. citifari offers photo tours in New York City. Structured as a 2-1/2 hour practical workshop, citifari tour helps you get comfortable with your camera settings and take great shots from New York City. visit citifari atwww.citifari.com, on facebook at www.facebook.com/citifari or on twitter @citifari. email Sam Levy at sam@citifari.com

Post originally from: Digital Photography Tips.

Check out our more Photography Tips at Photography Tips for Beginners, Portrait Photography Tips and Wedding Photography Tips.

Switch to Manual Mode


Deleting Catalog Backup Files
October 20, 2011 at 6:36 PM
 

I’ve been talking to a few people lately about deleting catalog backup files. If you backup and optimize your catalog every time you close Lightroom then, over time, you will end up with a lot of excess catalog backups.

Each of these backups will consume disk space so the question becomes – what is in these backups? What use are they? And can they be deleted safely?

Backup your catalog

When you set Lightroom to make a backup of the catalog what it does is to make a backup of just the catalog and not your images, or your previews, or the sidecar xmp files for your raw files, or your presets. While having a catalog backup is undoubtedly a useful thing, it is incomplete so you will need to have a system backup system in place to backup what Lightroom does not.

In fact, because Lightroom’s backup is only a catalog backup, some people don’t do a backup this way and instead rely on their regular system backup to take care of backing up everything – catalog included. I prefer to at least have Lightroom do a regular catalog backup but that’s my personal preference.

Which backups to keep?

Because the catalog backup files are all stored in different folders by date they will build up over time and keeping them all is not a necessity.

Delete_lightroom_catalog_backup_1.jpg

You can be selective about which ones you keep – you should, at least, keep the most recent backups because if your catalog is corrupt you will want to be able to recover using these. If the most recent backup has issues then you would progress backwards until you get one which isn’t corrupt.

Delete_lightroom_catalog_backup_2.jpg

So, if I use Lightroom every day, I would keep the backups from this week and then one from last week and one from last month and beyond that I could feel pretty safe about deleting the others.

Delete a catalog backup
To delete a backup, locate the backup folder and identify the backup folders to delete and go ahead and delete them.

You will find your catalog backups, if you didn’t change the default location for them, in a folder called Backups inside your Lightroom catalog folder.

If you changed its location you can find the location you selected when you’re next prompted to backup Lightroom – the location is reported in the dialog prompting you to backup. Here too you can change that location if desired.

Delete_lightroom_catalog_backup_3.jpg

One issue with the Lightroom catalog backups is that the location, by default, is inside the folder that contains the Lightroom catalog. So, if the disk containing the catalog becomes corrupt you could lose your Catalog backups too. You may prefer to backup to a different disk to protect against this likelihood.

Every one of us will have different preferences for how we backup, where we backup to, the frequency of backup and what we backup. It’s over to you now – do you use the Lightroom Catalog backup tool? If you do, do you store your backups in the default location? Do you delete excess backups regularly.

Post originally from: Digital Photography Tips.

Check out our more Photography Tips at Photography Tips for Beginners, Portrait Photography Tips and Wedding Photography Tips.

Deleting Catalog Backup Files


Olympus PEN E-PL3 REVIEW
October 20, 2011 at 12:06 AM
 

For me, this camera is a bit of a puzzle. Why?

Having just spent a week or so with the Olympus PEN E-P3, and coming away very impressed, I wondered why the company launched another model that seems to be virtually identical, except for price and some minor mods. I am now eagerly awaiting the third in the ‘collection: the Mini model.

E-PL3 - angle BLK 14-42mm II R.jpg

On the face of it, the E-PL3 LITE is a bargain as a mirrorless, interchangeable lens camera.
In my review you may find that some of the descriptions echo those in my review of the E-P3. Cos that’s how the camera is!

An echo!

E-PL3 - top BLK.jpg

Olympus PEN E-PL3 Features

With the camera’s Live MOS sensor expect to make a 34x26cm print from its maximum image size of 12.3 effective pixels. You can shoot video in Full HD 1920×1080 pixels in AVCHD format and, in MPEG4, 1280×720.

E-PL3 - back BLK.jpg

The review camera was supplied with the f3.5/14-42mm kit lens and, before getting into it too deeply, I was impressed that the rear LCD can swing 80 degrees up and 45 degrees down, enabling you to comfortably shoot high or low angle or shots. The E-P3′s rear screen has no such ability.

Olympus viewfinder.jpg

Also supplied with the review camera was the cute little electronic viewfinder that clips into the accessory shoe and gives you an eye level view on a tiny LCD screen. The only thing I missed was an eye sensor: you have to tap a button on the finder to alternate rear/top views. Perhaps ‘cute’ is a little misleading: the viewfinder stands 3.5cm above the body.

Olympus flash.jpg

One snag is that you have to demount the viewfinder if you want to slip the supplied flash unit to the accessory shoe. A bonus is that the output of the flash is adjustable. Taking it further, you can attach a wireless unit and trigger up to three external flash units.

Pot.jpg

However, the camera is about 10 per cent smaller and 15 per cent lighter than the PEN E-P3 … quite a lot when you are slipping it into a pocket.

Boat 3.jpg

The camera’s rear has a jog wheel, with access to flash, single/multi shot drive, exposure compensation, and AF target options; then there’s the info, menu and OK buttons, replay, enlarge screen (for precise focusing) and movie recording. The various buttons are labelled in a dimmish colour and hard to see in low light.

As with the E-P3 I was far from impressed by the viewfinder menu: cluttered, minuscule rows of type do not make an enjoyable operator experience.

But once you dig into the displays for scene modes (23 in all) and Art Filters (6) all is hunky dory, with bright, colourful illustrations.

Shooting movies is edgy: I found auto focus slow to detect some subjects. When you shoot a still while recording a movie the latter stops, then restarts a tad later. There could be a better approach.

Startup

From startup the PEN was able to capture its first shot in about a second; follow-ons came in as fast as I could hit the button.

ISO Tests

Olympus PEN E-PL3 ISO 200.JPG

Olympus PEN E-PL3 ISO 400.JPG

Olympus PEN E-PL3 ISO 800.JPG

Olympus PEN E-PL3 ISO 1600.JPG

Olympus PEN E-PL3 ISO 3200.JPG

Olympus PEN E-PL3 ISO 6400.JPG

Olympus PEN E-PL3 ISO 12800.JPG

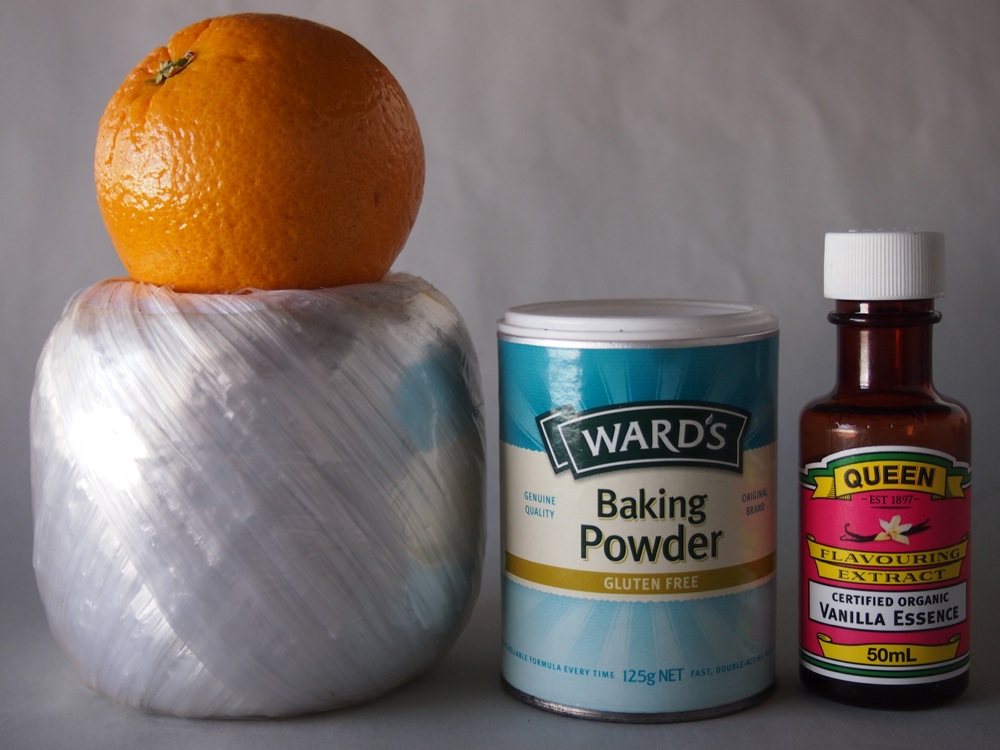
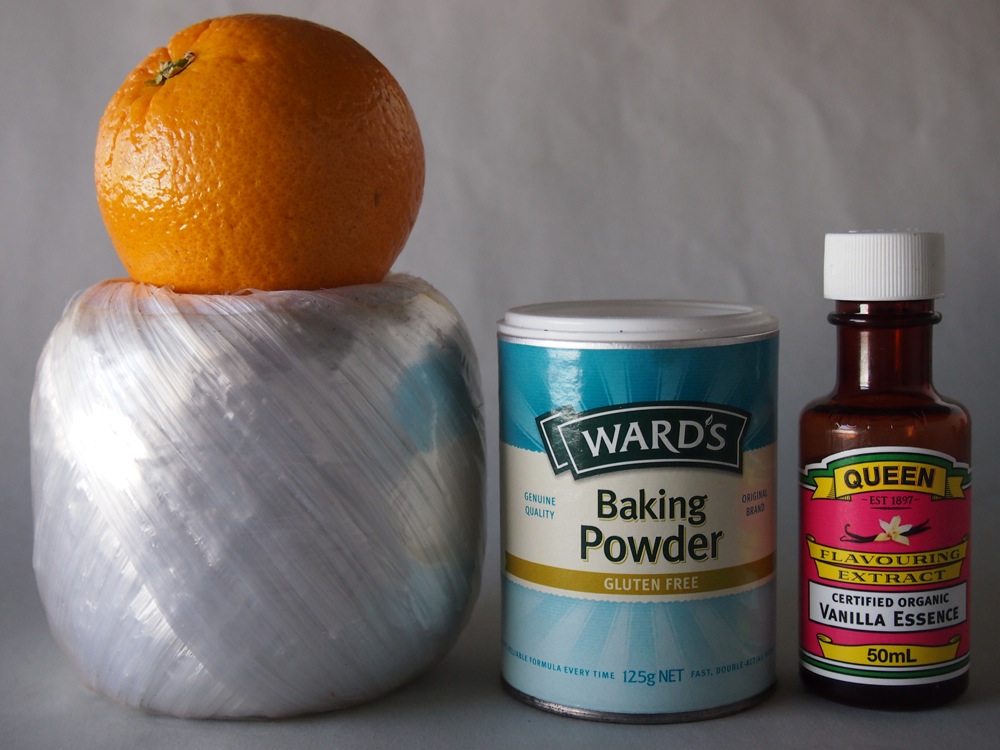
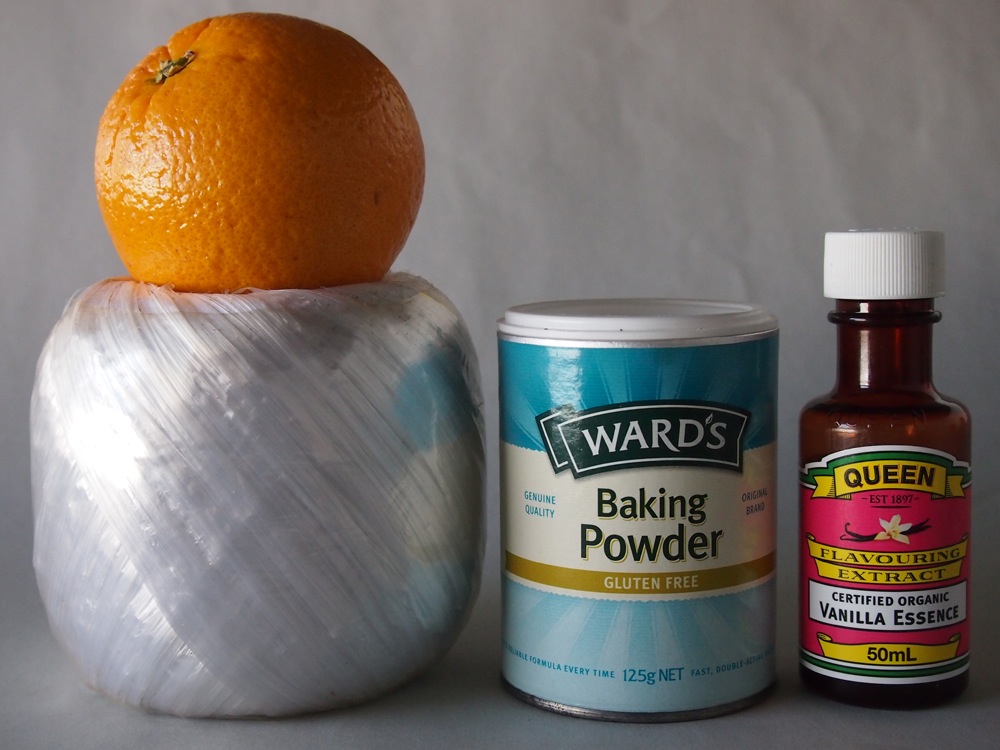
Presuming the sensor and processing in this camera are the same as in the E-P3 it is not surprising that the results are identical:

With noise and artefacts the camera is OK all the way to ISO 3200, with ISO 6400 showing trouble. By ISO 12,800 … forget it.

Olympus PEN E-PL3 Verdict

Quality: very sharp pictures and excellent colour rendition.

Why you'd buy the PEN: compact camera; good price; access to full range of Micro Four Thirds lenses and accessories.

Why you wouldn't: nothing to report!

The E-PL3 is available in four colours: black, silver, white and red. When the body colour is the lens colour is black; with a silver, white or red body colour, the lens colour is silver.

Note! All three models — Classic, Lite, Mini (E-P3, E-PL3, E-PM1) — have key core technology and performance similarities:

AF speed, imaging quality, Full HD video with stereo sound and the same six-core multi-processor.

They differ in size and style, controls, handling and target customer appeal.

The E-P3 has an OLED touchscreen and twin input dials. It’s larger in size and design.

The E-PL3 has one input dial and is aimed at the enthusiast.

The E-PM1 is aimed squarely at the fuss-free user who doesn’t care too much about settings but wants DSLR quality and HD video.

Boat 7.jpg

Olympus PEN E-PL3 Specifications

Image Sensor: 12.3 million effective pixels.
Lens: Micro Four Thirds system.
Exposure Modes: iAuto, Program AE, shutter and aperture priority, manual.
Effective Sensor Size: 17.3×13.0mm Live MOS.
35 SLR Lens Factor: 2x.
Shutter Speed: 60 to 1/4000 second, Bulb. Flash sync: 1/160 sec.
Sequential Shooting: 4/5fps.
Memory: SD/SDHC/SDXC/EyeFi cards.
Image Sizes (pixels): 4032×3024 to 640×480. Movies: 1920×1080 to 640480.
Viewfinder: 7.6cm LCD screen (610,000 pixels).
File Formats: JPEG, RAW, JPEG+RAW, MPO (3D) AVCHD, MPEG4.
Colour Space: sRGB, Adobe RGB.
ISO Sensitivity: Auto, 200 to 12,800.
Interface: USB 2.0, HDMI mini, AV.
Power: Rechargeable lithium ion battery, DC input.
Dimensions: 109.5×63.7×37.3 WHDmm.
Weight: 313 g (inc battery and card).
Prices: Get a Price on the Olympus PEN E-PL3 at the following online retailers:

Amazon:

B&H Photo:

Post originally from: Digital Photography Tips.

Check out our more Photography Tips at Photography Tips for Beginners, Portrait Photography Tips and Wedding Photography Tips.

Olympus PEN E-PL3 REVIEW


This email was sent to vijayaraj83.blogthis@blogger.com.
Delivered by Feed My Inbox
PO Box 682532 Franklin, TN 37068
Create Account
Unsubscribe Here Feed My Inbox


No comments:

Post a Comment